
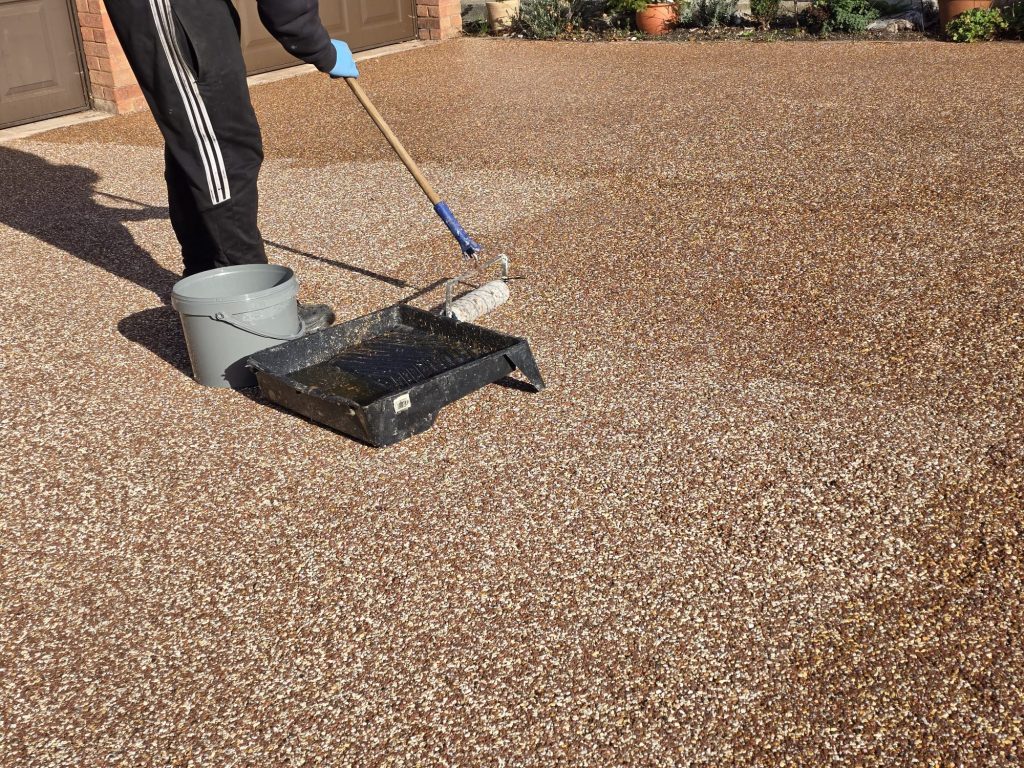
Has Your Resin Driveway Lost Its Colour? A Professional Clean and Reseal Can Bring It Back to Life
When a resin bound driveway is first installed, one of its most attractive features is the depth and variation of colour in the natural stone. Golds, greys, reds, creams and darker aggregates all stand out, giving the surface its distinctive appearance.
After several years, however, homeowners often contact us because they believe their resin driveway has faded or lost its original colour.
The good news is that in many cases, the stone hasn’t actually lost its colour at all.
Years of dirt, traffic film, algae, moss, atmospheric contamination and general weathering can gradually dull the surface. At the same time, the original resin at the top of the aggregate can become weathered and lose some of the rich appearance it had when first installed.
A professional deep clean followed, where appropriate, by a polyurethane reseal can make a remarkable difference.
Where Has the Colour Gone?
Resin bound surfacing is manufactured using naturally coloured aggregates mixed with a clear resin binder.
This means that the colour you see isn’t simply a paint or coloured coating applied to the driveway. Much of the appearance comes from the actual stone itself.
Over time, contaminants build up around and between those stones.
A driveway that originally contained warm gold, brown and cream aggregates can gradually appear grey and lifeless. Lighter surfaces can become dirty and patchy, while darker mixtures can lose some of their original depth.
This can happen so gradually that the homeowner doesn’t realise how much the appearance has changed.
Step One: A Proper Deep Clean
Before considering resealing, we first need to establish the actual condition of the resin surface.
A professional clean removes years of accumulated contamination and begins to expose the original aggregate again.
Depending on the condition of the driveway, this can include treatment for:
- General dirt and traffic film
- Moss and algae
- Organic contamination
- Tyre marks
- Oil and vehicle contamination
- Leaf staining
- Localised marks and staining
Pressure washing resin bound surfacing needs to be carried out correctly. Simply putting a powerful pressure washer close to the surface is not the answer.
Excessive pressure or an aggressive concentrated jet can potentially damage an ageing resin surface or loosen exposed aggregate.
We use controlled cleaning methods designed to remove contamination while protecting the existing resin bound surface.
Sometimes the difference after cleaning alone is dramatic.
Step Two: Assessing the Resin After Cleaning
Once the driveway is clean, we can properly inspect it.
Not every resin driveway needs to be resealed.
If the existing binder is still in excellent condition and cleaning has restored the appearance, further treatment may not be necessary.
However, on older surfaces we may find that the top of the aggregate has become dry-looking, the original sheen has disappeared, or some areas are beginning to show signs of surface wear.
This is where a suitable polyurethane resin reseal can make a significant difference.
What Does Resealing Do?
A clear polyurethane reseal coats the exposed contact points of the aggregate and refreshes the appearance of the existing resin surface.
One of the most noticeable effects is the return of depth of colour.
Think about what happens when you wet a decorative stone.
When dry, the stone can look relatively pale and flat. Once wet, its colours immediately become deeper and richer.
A suitable clear resin treatment can create a similar visual effect, enhancing the natural colours of the aggregate rather than painting over them.
Greys become deeper, golden aggregates become warmer and multi-coloured blends regain much of the contrast that originally made them attractive.
Cleaning and Sealing Work Together
Applying a new coating over a dirty driveway is not a proper restoration.
The surface needs to be thoroughly cleaned and appropriately prepared first.
Cleaning removes contamination and exposes the existing aggregate. Resealing then enhances and protects the cleaned surface.
This is why we normally view the process as a complete restoration:
Inspect → Treat → Deep Clean → Allow to Dry → Repair if Required → Reseal → Final Inspection
Preparation is one of the most important parts of achieving an even, attractive result.
It Can Also Help Strengthen an Ageing Surface
Resealing isn’t purely cosmetic.
On an ageing resin bound driveway, the uppermost contact points between stones can gradually become more exposed through years of vehicle and pedestrian traffic.
An appropriate polyurethane reseal can help rebind and reinforce these surface contact points, reducing the tendency for individual stones to become loose.
However, resealing isn’t a cure for structural failure.
If a driveway is extensively cracking, moving, delaminating or suffering from problems with the underlying base, we need to investigate the cause rather than simply cover the problem with more resin.
What About Loose Stones?
Occasional loose aggregate on an older driveway can indicate that the surface binder is becoming worn.
If deterioration is caught early enough, cleaning and resealing may be an economical way of refreshing and protecting the surface.
If significant areas have already failed, localised repairs or more extensive remedial work may be necessary before sealing.
This is why we prefer to assess each driveway individually.
The Difference Can Be Surprising
One of the most satisfying parts of resin driveway restoration is seeing the difference between the untreated and restored areas.
A driveway that looked grey, tired and significantly older can suddenly reveal the original blend of stones again.
After cleaning, the individual aggregate colours become much clearer. After resealing, the additional depth can make the surface look dramatically richer.
In many cases, customers who initially thought they needed a new resin driveway discover that their existing surface simply needed professional maintenance.
Cleaning and Resealing vs Replacing a Resin Driveway
If the driveway remains structurally sound, replacing it simply because it looks tired can be unnecessary.
Professional restoration can potentially:
- Restore the natural aggregate colours
- Remove years of accumulated contamination
- Improve the overall appearance
- Restore depth and sheen
- Rebind exposed surface aggregate
- Make subsequent cleaning easier
- Extend the useful life of an existing surface
- Cost considerably less than replacement
The important question isn’t simply “How old is the driveway?”
It’s “What condition is the driveway actually in?”
A well-installed resin surface can often be worth restoring.
How Often Should a Resin Driveway Be Cleaned?
We recommend regular sweeping and periodic cleaning rather than waiting until the surface becomes heavily contaminated.
Leaves and organic material shouldn’t be allowed to sit on the driveway for extended periods, particularly during autumn and winter.
A more thorough clean in spring and autumn can help keep the surface looking good and prevent contamination from becoming deeply established.
Resealing is different. It shouldn’t simply be applied automatically every year. The condition, age, wear and original resin system should be considered first.
Does Resealing Change the Colour?
A clear reseal doesn’t normally change your driveway from one aggregate colour to another.
Instead, it enhances the colours already present in the stone.
This is an important distinction.
If you have a golden aggregate driveway, resealing can make those golden tones richer. If you have a grey mixture, the greys and contrasting stones can become more defined.
It is effectively revealing and enhancing what was already there.
Professional Resin Driveway Cleaning, Repair & Resealing
At Resin Driveways Repair & Maintenance, we specialise in maintaining existing resin bound surfaces.
Our experience doesn’t come simply from pressure washing driveways. We understand how resin bound surfacing is manufactured and installed, how the binder behaves as it ages, and when a surface can be restored rather than unnecessarily replaced.
We can inspect your driveway and advise whether it would benefit from:
Professional cleaning • Stain treatment • Localised repairs • Crack repairs • Resin resealing • Surface restoration
If your resin driveway has become dull, dirty, faded-looking or has started losing occasional stones, don’t automatically assume that it needs replacing.
A professional clean and reseal could reveal just how much of the original colour is still there.
Contact Resin Driveways Repair & Maintenance for an assessment and quotation for resin driveway cleaning, repair and resealing.
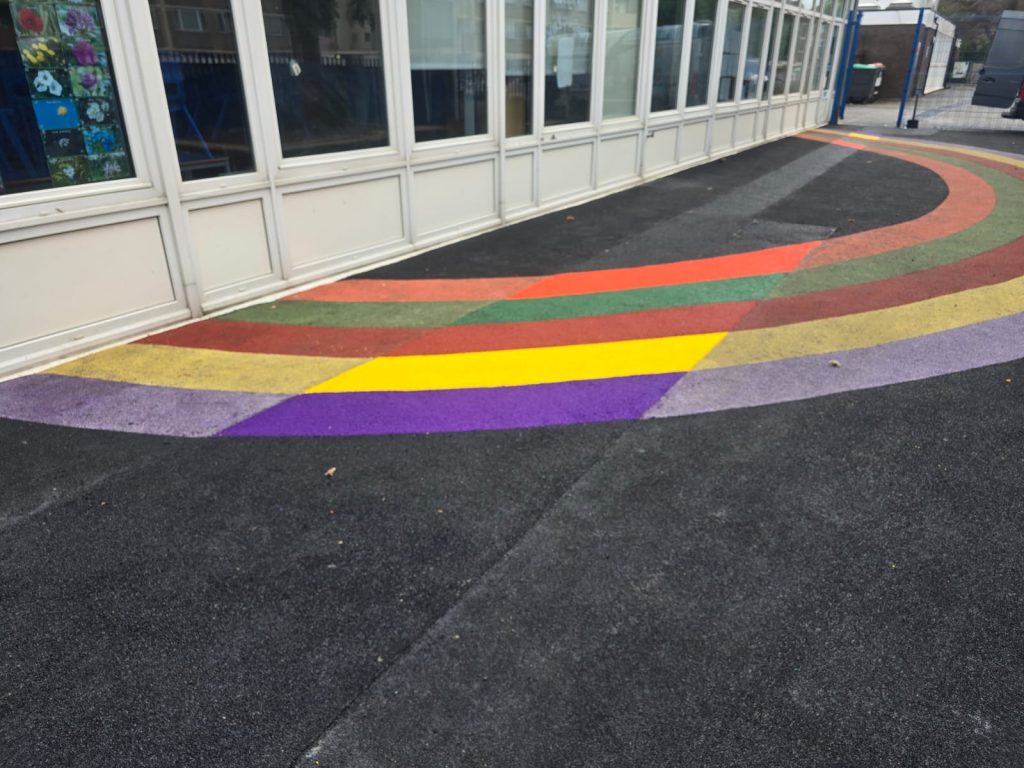
Wet Pour Playground Repair at a School in Hayes, London
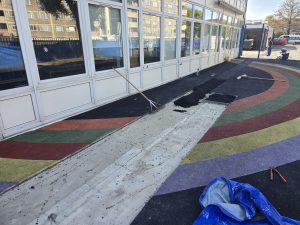
The existing wet pour safety surface had previously been cut and removed to allow contractors to access and repair damaged drain pipes beneath the playground. Once the drainage work was complete, the school needed the affected areas professionally reinstated — not simply patched over — so that the playground could once again provide a safe, level and attractive surface for pupils.
Working During the School Holidays
With any school playground project, timing is important.
The repair works were scheduled for the school holidays, allowing our team to carry out the necessary preparation, base reinstatement and wet pour installation without disrupting pupils or normal school activities.
It also provided sufficient time for the newly installed rubber surfacing to cure before the playground returned to regular use.
Reinstating the Base After Drainage Repairs
A successful wet pour repair starts underneath the visible rubber surface.
Where the playground had been excavated to repair the drainage pipes, the disturbed areas first had to be properly reinstated and prepared.
Our team checked the affected sections and reinstated the base to provide a firm, level and suitable foundation for the replacement wet pour system.
This stage is particularly important. Simply filling the excavation and applying rubber over an unstable or poorly prepared base can lead to settlement, cracking or separation later.
Preparing and Priming the Existing Wet Pour Edges
The existing wet pour was carefully prepared around the perimeter of each repair.
Loose and unsuitable material was removed and the edges were cleaned and prepared to create defined joints between the existing playground and the new material.
The prepared edges were then primed with the appropriate polyurethane binder before installation of the replacement wet pour.
Correct edge preparation is an important part of localised wet pour repairs because the objective is to create a strong bond between the existing surface and the newly installed material.
Matching the Existing Rainbow Colours
This particular playground had an attractive multi-coloured rainbow feature, which made the repair more interesting than a conventional single-colour patch.
Rather than leaving obvious blocks of replacement rubber, we selected matching EPDM colours and carefully reinstated the individual sections of the rainbow.
Each colour was mixed with polyurethane binder and hand laid into the appropriate section before being carefully trowelled and finished to meet the surrounding surface.
The result was a repair that became part of the original playground design rather than unnecessarily distracting from it.
Restoring the Playground Instead of Replacing It
One of the major advantages of wet pour surfacing is that localised damage does not necessarily mean that the entire playground needs replacing.
When the surrounding wet pour remains serviceable, affected areas can often be cut back, properly prepared and professionally reinstated. This can be particularly useful following:
- Underground drainage or utility repairs
- Installation or removal of playground equipment
- Localised settlement
- Damage around manholes and drains
- Cracking or splitting
- Damaged edges
- Vandalism or accidental damage
The important part is establishing why the surface has been disturbed or failed before deciding how it should be repaired.
In this case, the cause was known: sections of the playground had intentionally been excavated to provide access to the drainage system. Once those works were complete, we were able to rebuild the affected areas and restore the decorative wet pour finish.
The Finished Wet Pour Repair
Following completion, the previously excavated sections were once again incorporated into the surrounding playground, with the rainbow colours continuing across the repaired areas.
The school was left with a level, colourful and usable play surface ready for pupils returning after the holidays.
Projects like this demonstrate that wet pour repair isn’t only about filling a damaged area with rubber. Base preparation, edge preparation, colour selection and skilled installation all contribute to achieving a durable and visually sympathetic repair.
Wet Pour Playground Repairs in London
Resin Driveways Repair and Maintenance provides wet pour and rubber play-area repair services throughout London and surrounding areas, including work for schools, nurseries, playgrounds, parks and other commercial facilities.
We can assist with anything from small localised wet pour repairs to larger areas requiring base reinstatement and resurfacing.
Where possible, we can also match existing EPDM colours or use contrasting colours creatively, turning a necessary repair into part of the playground’s existing design.
If your wet pour playground has been damaged following drainage works, underground services, building works or general wear, contact our team to discuss the most appropriate repair.
Call 0800 970 2190 for advice or a quotation for wet pour playground repairs in London and surrounding areas.
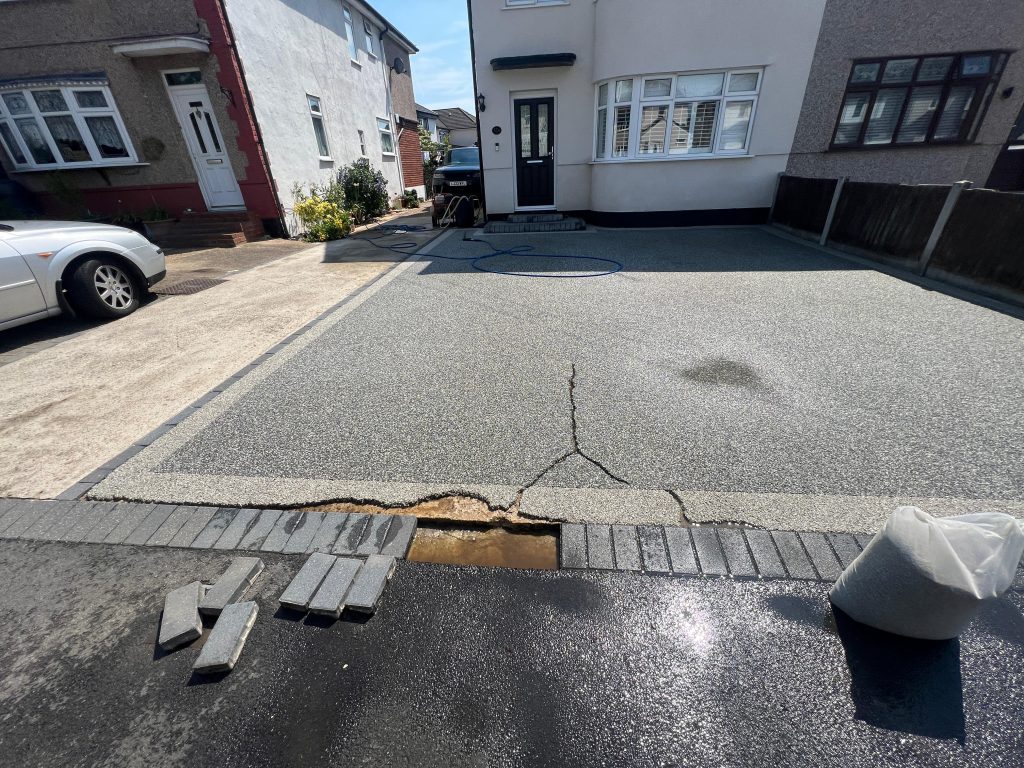
Resin Driveway Restoration in Romford: A Full Rejuvenation
At Resin Driveways Repair & Maintenance, we were recently called out to Romford to bring life back to a tired and damaged resin-bound driveway. Over time, even the highest-quality resin surfaces can suffer from wear, block movement, loss of permeability, or fading. This Romford project is a perfect example of how proper repair and maintenance can restore performance, looks, and longevity.
🔧 Step 1: Reinstating Loose Blocks
The edge of the driveway had suffered from movement in the block border, leading to instability and small gaps where the resin met the blocks. We carefully lifted and reinstated the loose blocks, ensuring a solid, even boundary that supports the resin surface and prevents further cracking or separation.
🧼 Step 2: Deep Cleaning the Resin Surface
Before any repair or resealing, it’s essential to thoroughly clean the resin-bound surface. We used professional cleaning equipment to remove built-up dirt, organic growth, and ingrained debris from within the surface. This is not just for appearance — it also reopens the pores of the surface, helping to restore permeability so water drains through properly again.
🧪 Step 3: Reinstating Permeability
A key feature of resin-bound driveways is their SUDS-compliant permeability, which prevents standing water and flooding. Over time, dirt and moss can block the porous structure. Our cleaning process reinstated the resin’s permeability, making the surface not only look better but also function like new.
🧴 Step 4: Resealing the Surface
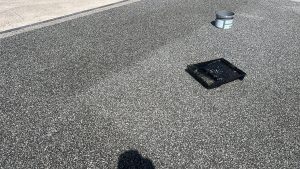
Finally, we applied a UV-stable resin sealant across the entire surface. This reseal serves two important roles:
-
Structural: It bonds loose stones, fills microcracks, and reinforces the surface to help extend its lifespan.
-
Aesthetic: It revives the original colour and brings back that clean, ‘wet-look’ finish that homeowners love.
✅ The Result
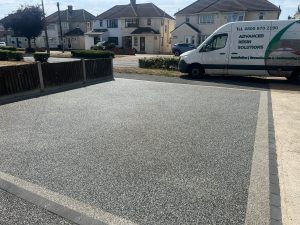
The Romford resin driveway is now fully restored, with secure edging, improved drainage, and a fresh appearance that enhances curb appeal. Our client was delighted with the transformation — a cost-effective alternative to a full replacement.
Need Your Resin Driveway Repaired?
If your resin driveway is showing signs of wear, cracking, or discolouration, don’t wait until the damage gets worse. We offer professional repair, cleaning, and sealing services across London and the South East.
📞 Contact us today for a free quote!
🌐 resindrivewaysrepairandmaintenance.co.uk
Expert Resin Bound Driveway Repairs: Achieving Near-Perfect Colour Matching
How to repair a crack in resin surfaces-Click for video
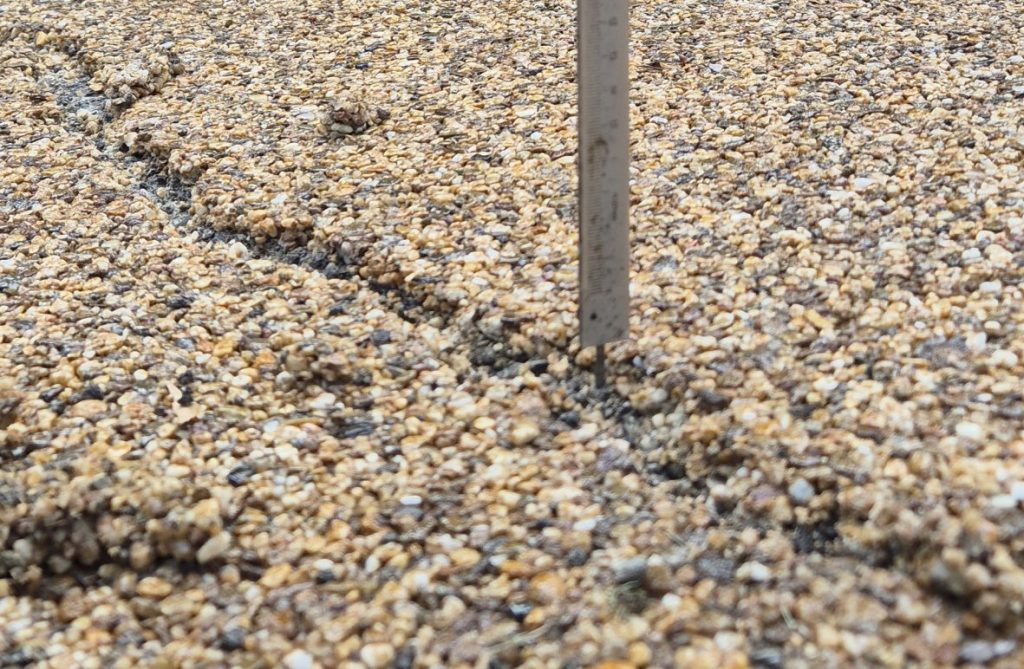
Resin bound driveways are renowned for their durability, sleek finish, and low-maintenance properties. However, even the most robust surfaces may experience wear and tear over time, leading to cracks or minor damage. Fortunately, resin bound driveways can be repaired effectively—with a high degree of colour matching—thanks to the extensive range of aggregates available and the skilled eye of a professional installer.
The Importance of Timely Repairs
Over time, resin bound driveways can develop cracks or minor surface imperfections due to environmental factors, heavy foot traffic, or natural settling of the substrate. Addressing these issues promptly is crucial for several reasons:
- Prevent Further Damage: Timely repairs stop minor cracks from expanding into larger, more costly problems.
- Maintain Aesthetic Appeal: A well-maintained resin driveway continues to enhance the curb appeal of your property.
- Extend Lifespan: Regular maintenance and repairs ensure the surface remains durable and functional for many years.
The Repair Process
The repair process for resin bound driveways is both straightforward and effective. Here’s how it’s typically done:
1. Assessment and Preparation
An experienced technician begins by conducting a thorough assessment of the damaged area. This includes:
- Identifying the Extent of the Damage: Determining whether the damage is localized or if it affects a larger area.
- Surface Preparation: The damaged section is carefully chiseled out, ensuring that the edges are clean and ready for the repair material. This step is critical to ensure that the new resin bonds effectively with the existing surface.
2. Selection of Matching Aggregates
One of the key advantages of resin bound systems is the wide variety of aggregates available. These aggregates come in many colours, sizes, and textures, making it possible to closely match the original look of the driveway. During the repair process:
- Expert Aggregate Selection: A skilled installer uses their experience and knowledge of the available aggregate range to choose the best match. With a large number of options, achieving near-perfect colour coordination is often possible.
- Custom Mixture: The selected aggregates are mixed with a high-quality resin. The mixing process is performed with precision, ensuring that every stone is perfectly coated for both aesthetics and durability.
3. Application and Finishing
Once the new resin-bound mix is prepared, it is carefully applied to the prepared area:
- Precise Application: The new mixture is laid down meticulously to ensure that it blends seamlessly with the existing surface.
- Edge Blending: Special attention is given to the repair’s edges, where the new material meets the old. With expert handling, these edges are finished to look as though they were part of the original installation.
- Curing and Inspection: After application, the repair area is allowed to cure properly. A final inspection ensures that the colour matching is as close to 100% as possible and that the repair is structurally sound.
Achieving Near-Perfect Colour Matching
Achieving a flawless repair is all about the details. Here are some factors that contribute to near-perfect colour matching:
- Wide Range of Aggregates: With countless aggregate options available, it’s possible to replicate the original colour, texture, and finish of the resin bound driveway.
- Expertise and Experience: A professional installer with an experienced eye can select the correct aggregates and adjust the resin mixture to ensure the repaired section is virtually indistinguishable from the rest of the driveway.
- Advanced Techniques: Modern repair techniques, including precise chiselling, mixing, and application, all contribute to a seamless finish.
- Environmental Exposure: While the repaired area might appear slightly different immediately after the repair, natural weathering and routine maintenance will help the new material blend even more effectively over time.
The Benefits of Professional Repairs
Choosing to repair rather than replace your resin bound driveway offers several key benefits:
- Cost-Effective: Repairs are often much more affordable than a complete replacement.
- Time-Saving: With proper planning and execution, repairs can be completed quickly—minimizing disruption to your daily routine.
- Aesthetic Continuity: Expert repairs ensure that the repaired section blends seamlessly with the rest of the surface, preserving the overall look and integrity of your driveway.
- Long-Term Durability: Quality repairs enhance the longevity of your resin bound driveway, ensuring it continues to provide a beautiful, durable surface for years to come.
Conclusion
Resin bound driveway repairs, when performed by experienced professionals, can be nearly invisible—thanks to a vast array of aggregate choices and expert application techniques. Even in cases where the surface has been damaged, timely repairs can restore both the functionality and aesthetic appeal of your driveway, preserving your investment and ensuring a long-lasting finish.
If you’re considering repairs for your resin bound driveway, contact us today for a free consultation. Our team of experts is dedicated to delivering repairs that blend seamlessly, providing you with a durable and visually appealing surface that stands the test of time.
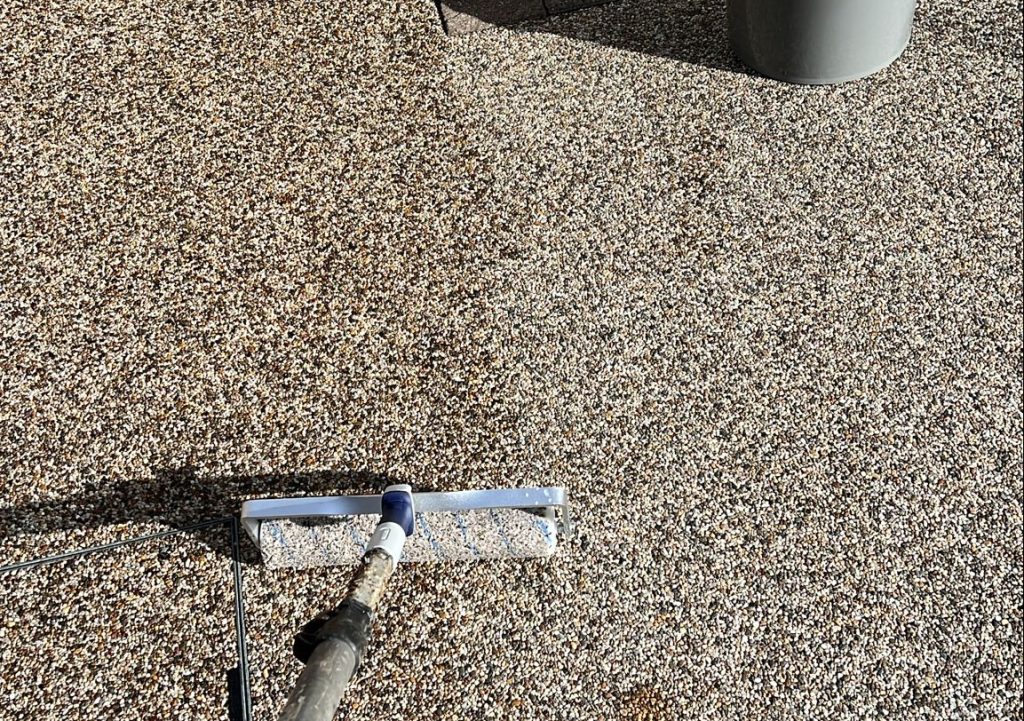
Revitalizing a Resin Driveway in Watford
Case Study: Revitalizing a Resin Driveway in Watford
Background
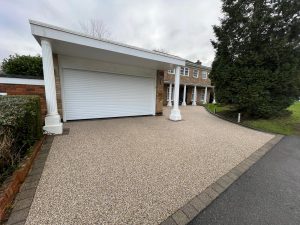
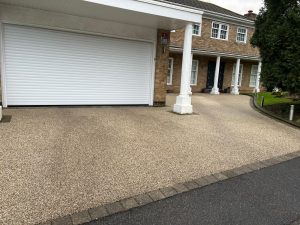
In Watford, a residential property required rejuvenation of its resin driveway. Over time, the surface had lost its original wet look and shine due to exposure to the elements. While the driveway remained structurally sound, the aesthetic appeal had diminished, prompting the need for professional restoration.
The Challenge
The primary challenge was to restore the vibrant, wet look and original shine of the resin driveway without compromising its integrity. Although sealing is often used to add strength to damaged surfaces, this project focused purely on aesthetic enhancement. The client’s goal was to achieve a refreshed, high-gloss finish that would make the driveway look as new as the day it was installed.
The Solution
Our expert team proposed a two-step process:
- Chemical Washing: The resin driveway was thoroughly cleaned using a specialized chemical wash. This step was critical for removing accumulated dirt, grime, and surface contaminants that had dulled the finish.
- Sealing: After ensuring the surface was completely clean and free from residues, a premium sealant was applied. On this occasion, the sealant was chosen specifically for its ability to reinstate the wet look and original shine of the resin surface.
The Process
- Preparation:
- The team assessed the driveway and identified areas that required extra attention.
- Protective measures were put in place to ensure that surrounding areas were safeguarded during the cleaning and sealing process.
- Chemical Washing:
- A high-quality chemical solution was applied across the entire surface.
- The chemical wash was allowed to work on breaking down and lifting the accumulated contaminants.
- A thorough rinse ensured that no residue was left behind, leaving a pristine surface ready for sealing.
- Sealing:
- A premium sealant was carefully applied to the cleaned resin surface.
- The sealant not only restored the wet look and enhanced the shine but also provided a protective barrier, preserving the driveway’s appearance for the long term.
- The application was done evenly to ensure a consistent finish across the entire surface.
Results
The project in Watford successfully transformed the resin driveway:
- Aesthetic Improvement: The chemical wash effectively removed years of grime, and the sealant reinstated the driveway’s original wet look and shine.
- Enhanced Appearance: The freshly sealed surface now boasts a vibrant, high-gloss finish that enhances the overall curb appeal of the property.
- Versatility of the Approach: While this project focused on aesthetics, the process is equally effective for adding strength to damaged surfaces, demonstrating the versatility of resin surface maintenance.
Conclusion
This case study highlights the importance of tailored maintenance solutions for resin surfaces. In Watford, the combination of a chemical wash and a targeted sealing treatment successfully restored a resin driveway’s original beauty. The project underscores how proper maintenance not only rejuvenates the visual appeal but also extends the longevity of resin surfaces. Whether for aesthetic enhancement or structural reinforcement, our expert team is equipped to deliver outstanding results for any resin bound project.
Extending the Life of a Resin Bound Stone Surface on a London Rooftop
Restoring a Worn Resin Bound Rooftop Surface in a London Tower
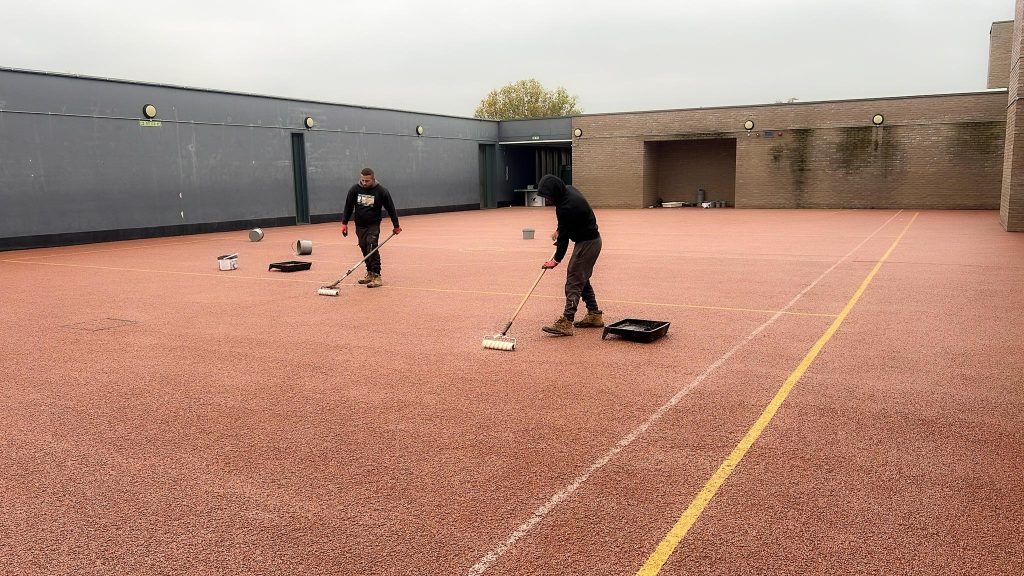
In a London tower, an old resin bound stone surface—installed as part of a permeable rooftop system—was showing signs of wear and age. Our team was called in to assess the surface and implement a solution to prolong its life without resorting to a complete replacement. Using a specialized chemical cleaning process, degreasing, and a polyurethane (PU) sealant application, we reinforced the surface and restored its functionality and durability.
The Problem
Over time, the rooftop resin bound surface began to lose its structural integrity due to several factors:
- Weathering:
Continuous exposure to harsh weather conditions weakened the surface binder. - Wear and Tear:
Heavy usage of the rooftop led to the loosening of stones in certain areas. - Aging Binder:
The effectiveness of the original binder had diminished, reducing the strength and cohesiveness of the surface.
Although the surface still functioned as a permeable roofing solution, the deterioration posed a risk to its long-term performance.
Our Solution
To restore and enhance the surface, a comprehensive three-step process was implemented:
1. Chemical Cleaning and Degreasing
- Specialized Chemical Cleaning:
The surface was cleaned using a specialized chemical solution designed to remove embedded dirt, debris, and contaminants. - Degreasing:
A thorough degreasing step ensured that the surface was completely prepared for the PU sealant, maximizing adhesion and performance.
2. PU Sealant Application
- Application of Polyurethane Sealant:
A high-quality PU sealant was applied to serve as an additional binder. The sealant penetrated the top layer of the resin-bound surface, strengthening the bonds between the stones. - Protective Barrier:
The PU layer provided a protective coating that shields the surface from further weathering and wear.
3. Curing and Inspection
- Curing Process:
The surface was allowed to cure thoroughly, ensuring optimal adhesion and durability. - Inspection:
A detailed inspection confirmed the uniform application of the sealant and the improved structural integrity of the surface.
Results
The restored rooftop resin bound surface now boasts:
- Enhanced Strength:
The additional PU binder significantly reinforced the surface, reducing the risk of stone loosening and extending its lifespan. - Improved Aesthetics:
The cleaning and sealing process revitalized the appearance of the surface, making it look newer and more appealing. - Long-Term Protection:
The protective PU layer acts as a barrier against future weathering and daily wear, ensuring continued functionality as a permeable roofing solution. - Cost Efficiency:
By opting for restoration rather than full replacement, the property owner achieved excellent results while saving significantly on costs.
Conclusion
This project highlights how innovative restoration techniques can extend the life of resin bound surfaces even in challenging environments like rooftops. Our expertise in chemical cleaning, degreasing, and PU sealing ensures that surfaces remain durable, functional, and visually appealing for years to come. For property owners looking to maximize the value of their existing resin bound installations, our solutions offer an effective and economical option.
Revitalizing a Rubber Crumb EPDM Play Area Walkway in Reading
Transforming a Worn-Out Walkway into a Design Feature: A School Project in Reading
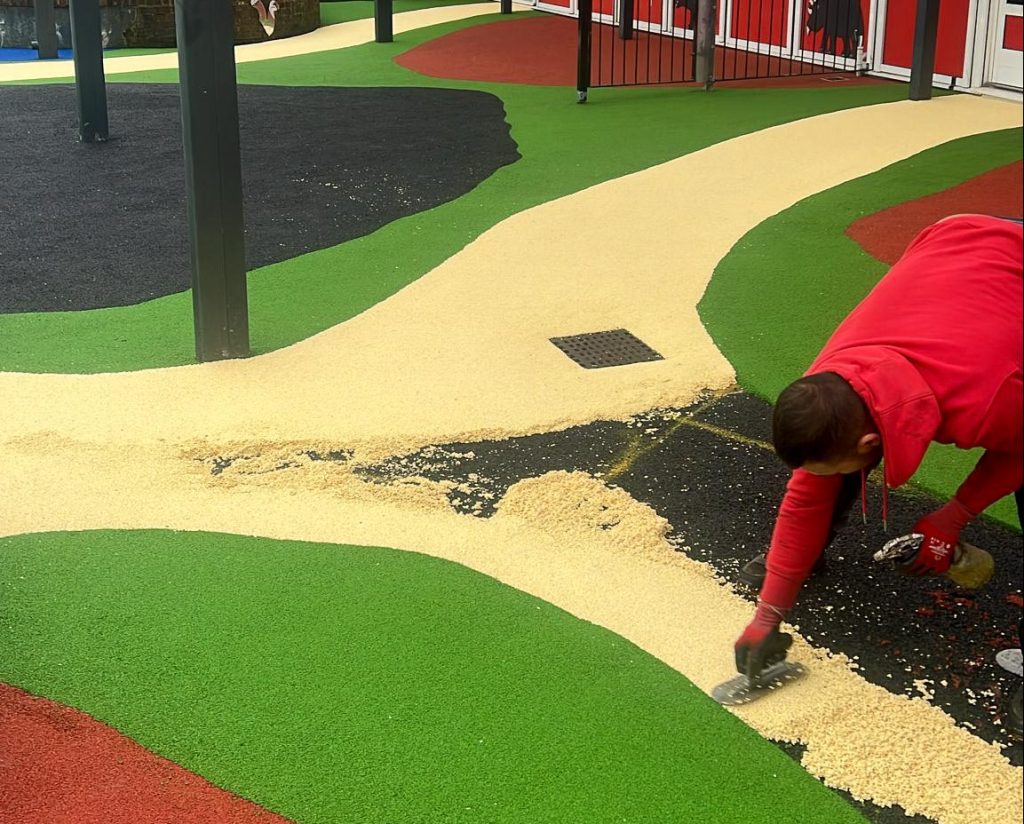
A school in Reading approached us with a challenge: repair a worn-out patch in their EPDM rubber crumb play area. The damage, located in a high-traffic walkway, was not only a functional issue but also detracted from the aesthetic appeal of the space. Our team saw this as an opportunity to enhance the play area by transforming the damaged walkway into a visually appealing feature.
The Problem
Over time, the main walkway in the play area had developed a worn-out patch due to heavy foot traffic. This deterioration compromised both the safety and the appearance of the space. The school needed a solution that was durable, effective, and would seamlessly restore the area without disrupting the overall design of the play area.
Our Solution
To address the issue effectively, we implemented a multi-step process that went beyond simple patching. Our approach not only repaired the damage but also added a creative element to the walkway.
Damage Assessment and Preparation
- Detailed Assessment:
We began by carefully assessing the damaged area to determine the extent of the wear and tear. - Precise Cutting:
The damaged section, along with a bit of the surrounding area, was carefully cut out. This ensured a clean and even edge, providing a solid foundation for the repair.
Feature Design
- Creative Concept:
Rather than just patching the damaged area, we proposed turning the walkway into a feature. We suggested using a different color for the new EPDM topcoat to create a striking contrast that would enhance the play area’s design.
Installation Process
- Base Preparation:
The cleaned base was meticulously prepped to ensure proper adhesion of the new EPDM layer. - Application of New EPDM:
We applied a high-quality EPDM rubber crumb in a contrasting color over the prepared area. This method not only restored the integrity of the walkway but also created a visually appealing feature. - Seamless Finish:
The material was laid seamlessly to ensure both durability and a smooth, even finish, capable of withstanding heavy foot traffic.
The Results
The completed project delivered outstanding outcomes:
- Enhanced Aesthetics:
The contrasting color transformed the repaired walkway into a standout feature, adding visual interest and enhancing the overall design of the play area. - Improved Safety:
The new EPDM topcoat provided a soft, slip-resistant surface, significantly enhancing the safety of the walkway for students. - Long-Term Durability:
By using premium materials and expert installation techniques, we ensured that the walkway will endure heavy foot traffic for many years to come.
Feedback
The school was thrilled with the transformation. The innovative use of a contrasting color not only resolved the functional issues but also introduced a unique design element that was appreciated by both staff and students.
Conclusion
This project demonstrates how repair work can be transformed into an opportunity for creative improvement. By turning a damaged walkway into a colorful, functional design feature, we delivered a solution that enhanced both the practicality and aesthetics of the play area. At Resin Driveway Repairs and Maintenance, we are committed to combining functionality with creativity in every project we undertake.
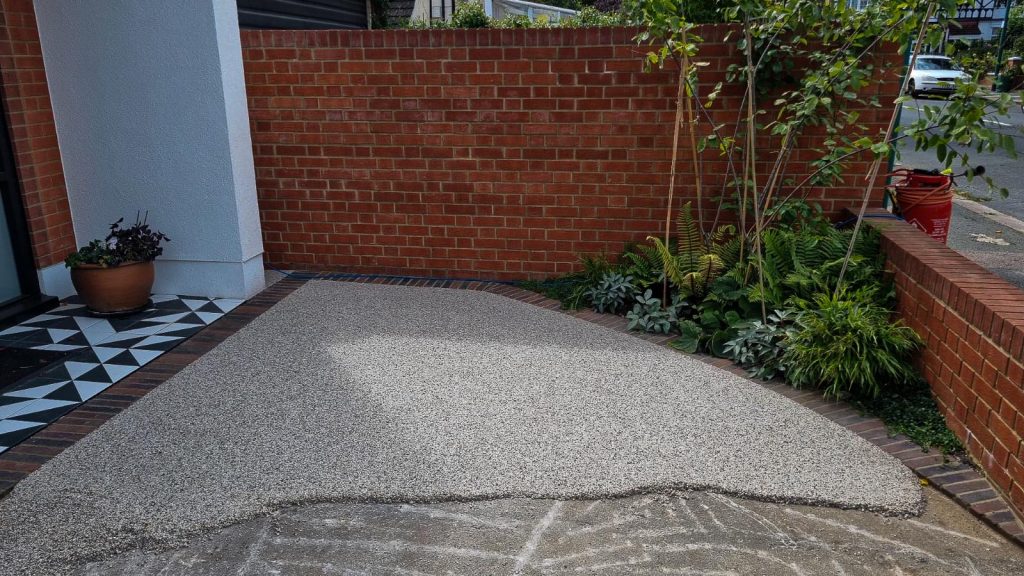
Small Driveway Replacement Due to Incorrect Resin Mix
Our team at Resin Driveway Repairs and Maintenance was tasked with repairing a small driveway that had failed prematurely. Upon inspection, it became clear that the existing surface required complete removal and replacement due to issues stemming from an incorrect mix of materials used during its initial installation.
The Problem: The original driveway had been constructed using a combination of soft aggregates with increased microporosity, coupled with insufficient binder. This mix led to several critical issues:
Weak Structural Integrity: The soft aggregates lacked the necessary durability, causing the surface to break down under regular use.
Increased Water Absorption: The high microporosity of the aggregates allowed water to infiltrate, exacerbating surface degradation.
Binder Deficiency: An inadequate amount of binder left the aggregates poorly bonded, resulting in loose stones and a crumbling surface.
These factors combined to cause the driveway to deteriorate far earlier than expected, leaving the homeowner frustrated and seeking a long-term solution.
To address the issues, we implemented a proven system designed to ensure durability, aesthetic appeal, and permeability. Here’s how we executed the project:
Removal of Existing Surface:
The entire faulty driveway was carefully taken up, with all the defective materials removed to prepare a clean and stable base.
Application of Quartz-Based System:
We used quartz aggregates, renowned for their hardness of 7 on the Mohs scale. This high level of hardness ensures exceptional durability, making the surface resistant to wear and tear.
The aggregates were selected with a balanced mix of sizes, providing multiple contact points between pebbles. This configuration enhances the structural stability of the surface while maintaining appropriate permeability.
Optimized Binder Application:
We applied a precise amount of high-quality resin binder, ensuring the aggregates were securely bonded while allowing the surface to remain permeable. This careful balance prevents water pooling and reduces the risk of long-term damage.
Final Installation:
The new resin-bound surface was installed seamlessly, creating a smooth, durable, and visually appealing driveway. The design complemented the property while meeting the homeowner’s expectations for longevity and functionality.
Results:The replacement driveway now boasts:
- Enhanced Durability: The quartz-based system ensures the surface withstands heavy use without degradation.
- Improved Permeability: The balanced aggregate mix allows for efficient water drainage, preventing pooling and reducing maintenance requirements.
- Long-Term Performance: With the correct binder ratio and robust materials, the new surface is designed to last for many years, providing peace of mind to the homeowner.
This project highlights the importance of using well-tested materials and proper installation techniques in resin-bound systems. By replacing the faulty driveway with our quartz-based solution, we delivered a surface that is not only functional and durable but also enhances the property’s curb appeal. At Resin Driveway Repairs and Maintenance, we’re committed to providing reliable solutions that stand the test of time.
How to Handle Rust Spots on Resin Driveways: Causes, Solutions, and Prevention
Rust Spots on Resin Driveways: Causes, Treatments, and Prevention
Resin driveways are celebrated for their durability, low maintenance, and aesthetic appeal. However, in rare cases, rust spots may develop due to mineralogical conditions. At Advanced Resin Solutions, we understand the frustration these stains can cause. Below, we explore why rust spots appear on resin driveways, how we treat them, and the solutions available if stains prove stubborn.
Why Do Rust Spots Appear on Resin Driveways?
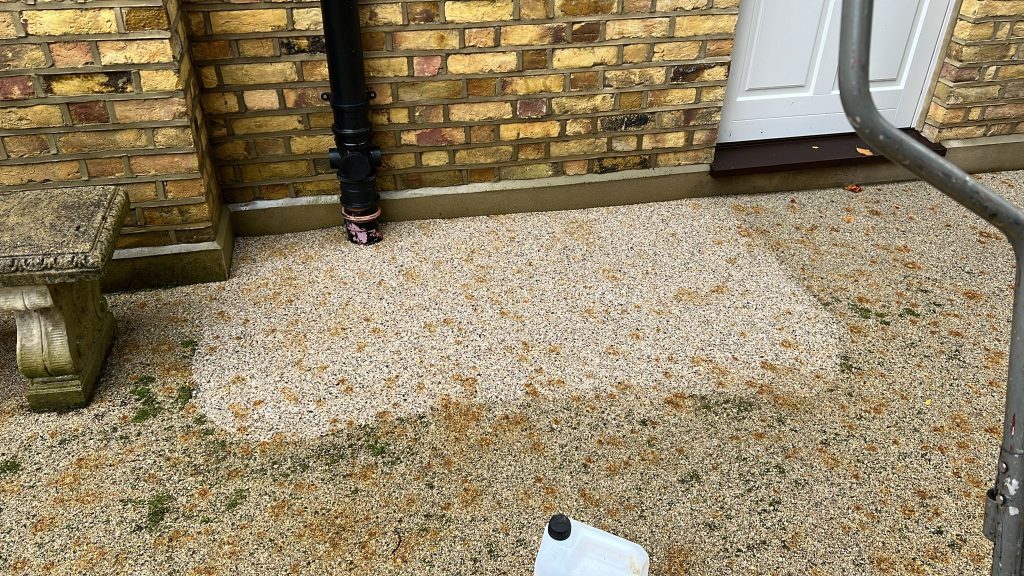
The primary cause of rust spots on resin driveways is the high iron content found in certain aggregates. Although aggregates are carefully chosen for their strength, durability, and visual appeal, some natural stone aggregates contain trace amounts of iron. When exposed to moisture—whether from rainwater, sprinklers, or other sources—the iron oxidizes over time, leading to the formation of rust spots. This phenomenon is more likely in areas with high moisture levels or when aggregates with a higher iron content are used.
How We Handle Rust Spot Removal
When rust spots develop, our professional cleaning service can significantly reduce the staining. Using specialized cleaning solutions that are safe for resin surfaces, we typically remove at least 70% of rust spots, restoring much of the driveway’s original appearance. However, because the iron is embedded within the aggregate, deep rust stains can be challenging to eliminate completely. Regular maintenance and early intervention are key to preventing stains from setting in too deeply.
When to Consider an Overlay
In cases where rust spots are extensive or deeply embedded, complete removal might compromise the overall look of the driveway. For these situations, we offer an alternative solution: overlaying the existing surface with a new layer of resin bound paving. This method provides several benefits:
- Prevents Rust Leakage: The fresh resin layer prevents any rust from the original surface from penetrating the new finish.
- No Need for Removal: The process is non-invasive, as it doesn’t require the removal of the existing surface, making it quicker and more cost-effective.
- Fresh, Seamless Appearance: The overlay creates a brand-new, clean look, effectively eliminating visible rust stains.
Preventing Rust Spots on Resin Driveways
While rust spots due to iron-rich aggregates are uncommon, there are steps you can take to minimize the risk:
- Select the Right Aggregates: Work with professionals to choose aggregates with low iron content when planning your resin driveway.
- Maintain Regular Cleaning: Keep your driveway free from standing water and excess moisture to prevent rust from forming.
- Early Treatment: Address any early signs of staining promptly to avoid more extensive damage later on.
Conclusion
Rust spots on resin driveways are a rare occurrence compared to other surfaces, but they can happen due to the natural composition of certain aggregates. At Advanced Resin Solutions, we offer effective cleaning services to reduce rust stains and, when necessary, a practical overlay solution to ensure a rust-free, aesthetically pleasing surface. Contact us today to discuss how we can restore or refresh your resin driveway, keeping it pristine and beautiful for years to come!
Managing Tyre Marks on Resin Driveways: Effective Cleaning Solutions
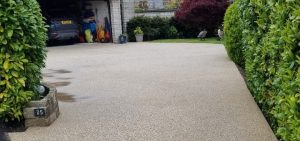
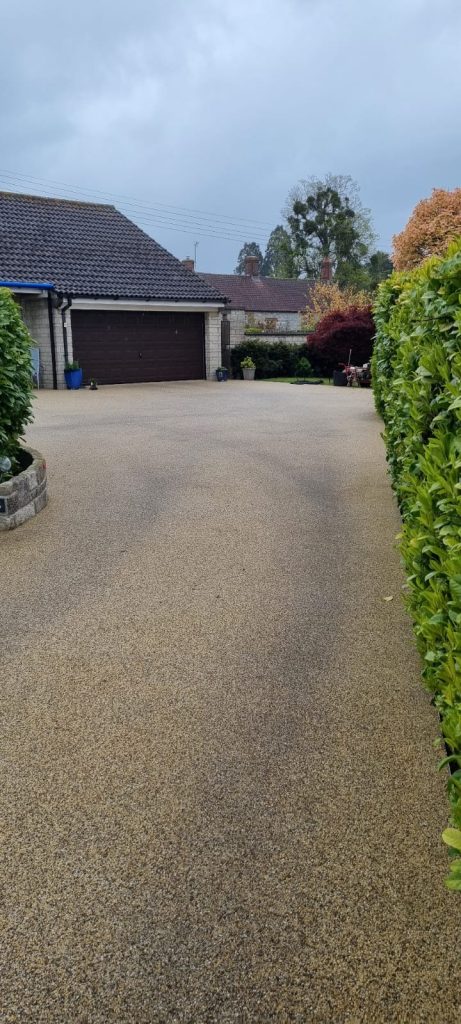
Resin driveways have soared in popularity due to their aesthetic appeal and durability. However, with the recent spikes in summer temperatures, an increase in tyre marks on these surfaces has been noted. These marks are typically more noticeable on lighter-colored resin driveways and can be attributed to softer tyres during hot weather. Fortunately, tyre marks are a normal occurrence and can be cleaned effectively. This blog will guide you through understanding why these marks appear and how to remove them using specialist cleaning products.
Why Do Tyre Marks Appear?
During hot summer days, the heat causes tyre rubber to soften. As vehicles drive and park on your resin driveway, the softened rubber can leave visible marks, especially on lighter surfaces. These marks are superficial and do not indicate any damage to the structural integrity of the driveway.
DIY Cleaning Tips:
For those who prefer the DIY route, there are several methods to effectively remove tyre marks from your resin driveway:
Soap and Water: Often, a simple solution of soap and water, along with a stiff brush, can remove fresh tyre marks. Rinse the area thoroughly with clean water afterward.
Specialist Cleaning Chemicals: There are cleaning products specifically designed for resin surfaces. These cleaners can tackle tougher marks without damaging the driveway. Always follow the manufacturer’s instructions to ensure the best results.
Professional Cleaning Services:
If DIY methods do not suffice or if you prefer a professional touch, our team is here to help. We offer specialized cleaning services that not only remove tyre marks but also maintain the pristine condition of your resin driveway. Our professional cleaning services use high-quality products that are safe for your driveway and the environment.
Preventive Measures:
To minimize the appearance of tyre marks:
Regularly clean your driveway to avoid the build-up of debris and dirt.
Consider applying a sealant to your driveway, which can provide a barrier between the resin and the tyres, making it easier to clean any marks.


